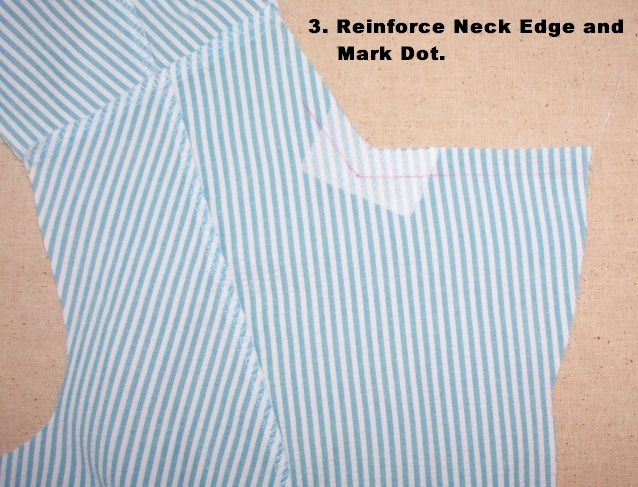
Pin the collar to neck edge, matching collar to the shirt at center back and shoulders, taking special care to match those dots you marked on both the collar and the shirt.

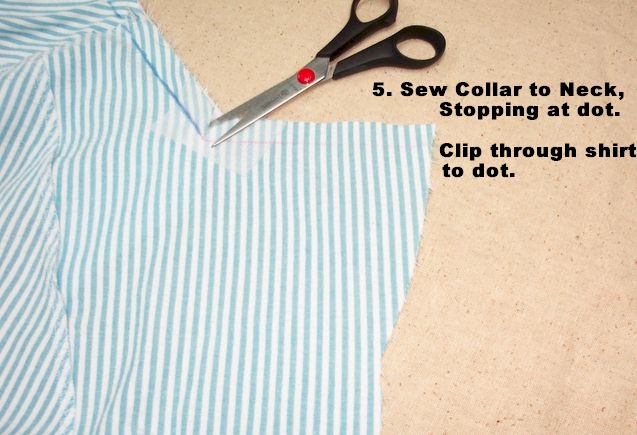
Stitch the collar to the shirt, from center back to the dot. I have marked this stitching line with a blue pencil so it can be easily seen in the photo. Stop stitching when you reach the dot, then clip to the dot through the SHIRT ONLY.
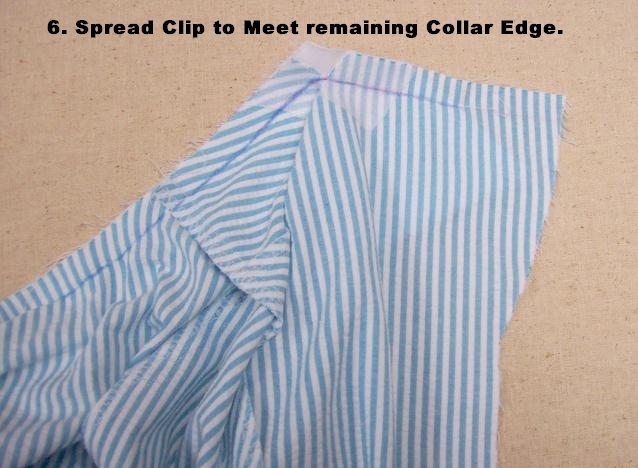
Spread the shirt to meet the remaining edge of the collar, and stitch. Again, I have marked the stitching with a blue pencil so you can see it clearly in the photo.
This is how the collar will look as viewed from the right side. I have marked the corner area stitching in pink pencil so it can be more easly seen in the photo.

The next step is applying the facing. Do this as you always do, sandwiching the collar between the shirt and the facing, right sides together. When you get to the inside corner of the FACING, you will need to clip into the corner of the FACING ONLY, then spread it to meet the remaining neck edge...just like you did with the inside corner of the shirt. After turning and pressing, the collar/lapel will look like the following photo (on the inside/wrong side of the garment).

This photo shows what the applied collar and facing will look like from the right side.

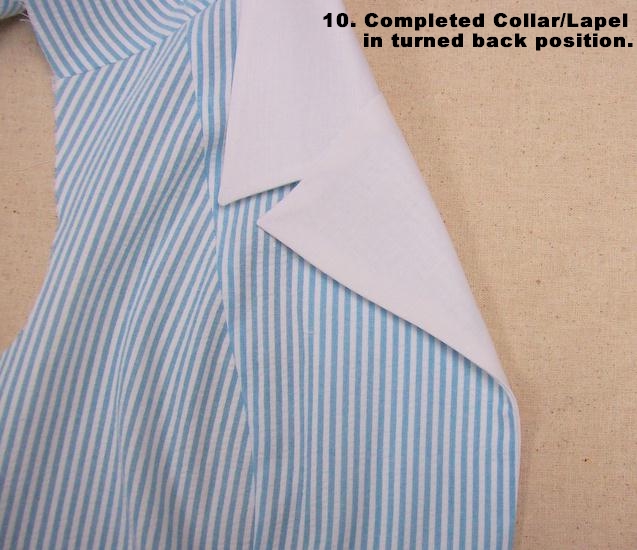
Finish the facing and clean finish the neck edge of the collar as desired, then turn back your completed collar/lapel and admire your work!
Beautiful work, as always, and you make it look so easy. Great tutorial!
ReplyDeleteVery nice, Pam. Thanks so much for showing each step so clearly.
ReplyDeleteMiriam
Beautiful work. Thank you very much for sharing such wonderful, detailed photos.
ReplyDeleteLora
Such perfectly clear instructions and photos. A difficult process broken down into manageable parts. Excellent example.
ReplyDeleteDawn Cloake UK
Thanks for a great tutorial. The text and pictures make the process perfectly clear.
ReplyDeleteCarol
Thanks Pam. Great tutorial.
ReplyDeleteWonderful tutorial!!! THANK YOU
ReplyDeleteBeautifully done sewing job and tutorial.
ReplyDeleteHmmm, I am working on a blue and white checked gingham with a white collar, too. Maybe it's something in the wind?
You make it look so easy to sew beautifully. Thanks so much for this great tutorial, Pam! -Carol
ReplyDeleteThank so much Pam, the photos really help see how it goes together. Thanks for sharing.
ReplyDeleteJust dropping you a note to compliment you on your blog! Being a sewing enthusiast myself, I found it give very thorough instructions with beautifully clear photos. I would like to send you a free pattern from my pattern store, www.sewinggarden.com. If you're interested please email me at:
ReplyDeletesusan@sewinggarden.com
best regards,
Susan
Beautiful, Pam! Thanks so much.
ReplyDeleteMary
Truly beautiful. Thank you for posting this very clear explanation and enlightening illustration.
ReplyDeleteI love your site. You have instructions with pictures that are so detailed. I have taken online classes and no one has ever had pictures with detail instructions like this one. Thanks for sharing.
ReplyDeleteVanessa Towns
Wow, if only the hot patterns instructions could've ezxplained it so clearly....thanks!
ReplyDeleteYour tutorial is the best I have ever seen on this subject. It explains the process beautifully and in understanding detail.
ReplyDelete- Marysewfun
Thanks for the great tutorial! Precise and expertly explained.
ReplyDeletePam, What a good, classic shirt. I can't wait to make one. And what an elegant collar and lapel. thanks for the tutorial. Your posts and photos are always so encouraging and inspiring.
ReplyDeleteI just made a version of this shirt, and your collar instructions helped, tremendously! Thank you so much for posting them.
ReplyDeleteToday is my lucky day! Your tutorials are just what I was looking for. thank you.
ReplyDeleteToday is my lucky day! Your tutorials are just what I was looking for. thank you.
ReplyDelete