


TUTORIAL-- Fast and Fabulous Fabric Loops!
I do not have much time to sew these days, but I do have time to show you how I make "fabric loops"...for functional purposes. There is such a loop included in the Colette Patterns Negroni Shirt.
There are similar methods for making a length of tube to use for multiple buttons, however please note that this tutorial shows how I make a single flat loop for the specific purpose of replacing a buttonhole at the very top of a Convertible Collar shirt.

~Click Photos to enlarge...to return to blog, click your browser's Back Button~
To make a single button loop, first start by cutting a strip of fabric on the bias that is about 1" wide and about 3" long. Then as shown above, fold it in half width-wise (RIGHT SIDES TOGETHER) and "finger press" along the folded edge to make a center crease.

Now at your machine, pull out a long length of both the bobbin and top thread. As shown above, leave a loop of both thread tails behind the presser foot. Then lay the rest of the pulled thread tails along the inner "valley" of the fold you made in the fabric strip. What we are doing here is making our own "tool" out of thread, that we will later use as a handle to easily turn our loop!

Fold the bias strip in half, enclosing the thread tails as shown above. Loosen the top tension of your machine a little bit (if it is set at 5 for instance, loosen to 4.5).... then stitch a 1/4" seam.

The photo above shows what your stitched bias strip will look like after it is removed from the machine.
Note that the thread tails are attached at one end of the seam, but loose inside the fold of the strip.


Then take your turned strip to your pressing surface and press it flat, with the seam along one edge, as shown above.
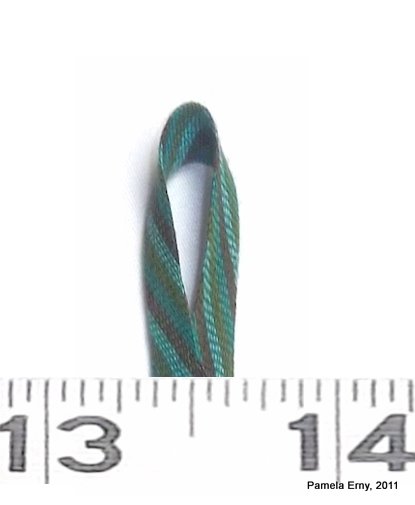
Now we are going to "set" the bias and make our turned strip narrow and neat. While still at your pressing surface, spray your flattened strip on both sides with some plain water until it is quite damp. Then pick it up, holding the short edges, one in each hand...and pull. Pull hard, so that the bias strip stretches, lengthens, and becomes more narrow. Then cover with a press cloth, and press the stretched strip until it is dry. It will look something like this--


Labels: More Sewing Tutorials
13 Comments:
Pam, that's such a clever solution to doing tricky loops (tricky for me - but not any longer if I use your method now !!). Thank you for sharing :)
What a simple and ingenious idea! Thanks for posting about it.
That's so elegant, and great results. Thankyou for posting this.
Wow....what a great idea!!! Thank you!
Great tip and tutorial! Thanks!
Your tips are ALWAYS so helpful. Thanks for sharing!
As usual you have given me another technique for shirts. I've always avoided putting the top tab on camp shirts because they were infernally impossible to get right. Not any more. Great tutorial.
Whoa! what an elegant process! Thank you, Pam!
Love it! I do the same thing with skinny bias straps for formal dresses, etc. That way, they don't stretch out while the dress is being worn.
That. Is. COOL. how exciting. I'm going to try this today!!!
Perfect method and explained so clearly. Thank you.
Thanks for posting that great tip!
AWesome - thank you. You have the BEST tutorials!
Post a Comment
<< Home