OTC-011 Off The Cuff ~Sewing Style~ <body><script type="text/javascript"> function setAttributeOnload(object, attribute, val) { if(window.addEventListener) { window.addEventListener('load', function(){ object[attribute] = val; }, false); } else { window.attachEvent('onload', function(){ object[attribute] = val; }); } } </script> <div id="navbar-iframe-container"></div> <script type="text/javascript" src="https://apis.google.com/js/platform.js"></script> <script type="text/javascript"> gapi.load("gapi.iframes:gapi.iframes.style.bubble", function() { if (gapi.iframes && gapi.iframes.getContext) { gapi.iframes.getContext().openChild({ url: 'https://www.blogger.com/navbar/10604511?origin\x3dhttp://off-the-cuff-style.blogspot.com', where: document.getElementById("navbar-iframe-container"), id: "navbar-iframe" }); } }); </script>

11/18/2011

Tutorial--The "Knotted" Cowl (with added Instructions)


A funny thing happened on the way to making my newest "hide the neck scars" Cowl tunic....I scooped the neckline way too low!  Uh-oh!  I had to think of a way to "fill it up" with the collar, because I didn't have enough fabric to cut another front. In fact, by the time I discovered that the neckline was too low, almost the entire garment was sewn...sigh :( 
Luckily,  I remembered a cowl variation that I used to teach years ago, when my family owned a fabric store...The "Knotted" Cowl.


Here is a close-up of the collar--


What looks like a "knot" at Center Front is actually a manipulated pleat, and here is how it's done....

(click on any photo to enlarge it)

From the wrong side of the garment, I located the CF of the cowl collar by folding the tunic in half. Then as shown below, I stitched a 2-inch deep pleat from the top edge of the collar (through all thicknesses) , stopping about 2" from the neckline seam. Leaving that last 2" of the pleat unsewn will mean something later on in the process--


Next, I made a quick trip to my ironing surface and gently pressed the pleat flat...yes, making a simple box pleat :)  And that is just about all there is to it!  
Except for some very simple folding. Below is the tunic on my form, right sides out (photo lightened for clarity). 
The Cowl Collar has been folded down one time, all the way around. You can clearly see the box pleat that was made. The pin that you see is only there so I could photograph this first fold....  


...because, without the pin holding the first fold of the collar up, the weight of the pleat almost "automagically" makes the Cowl Collar fold itself again at CF...giving the illusion of a "knot" as shown below--


Now, with just a little bit of tucking-under of the CF  into the "dimple" (made when the bottom part of the pleat was left unsewn), there it is...a "knot" that's not a knot !

What follow is a series of photos to make the folding/tucking part of this design more clear--    All of the photos below can be Clicked to enlarge them.


First of all, remember that the pin is ONLY here to hold up the first fold-down of the cowl collar, so that I can show what comes next...it has NO other purpose.  When you make yours, you will not need that pin at all...it serves No construction purpose...I ONLY needed to put it there to show you what comes next.

OK...the red circle in the photo above shows the "Hollow"  or "Deep Dimple-like Hole"  that was made by leaving the last 2" of the pleat NOT sewn (as demonstrated  in the series of photos of the original tutorial).  When you look closely at the photo above, you can "little fold edges" that show where the "Hollow/Dimple/Hole" is located.


 Now....to form the "False Knot", One Last Fold or it could be called a "Tuck and Roll-Under" needs to be made.... --click photo below to enlarge--   (Notice that the pin is NOT there now).


As shown ABOVE by my crudely drawn arrows (sorry..best I could do).....So, as shown by those arrows, the LAST steps are to TURN and ROLL the edge of the collar UNDER ITSELF all the way arround, and THEN use the "DIMPLE/HOLLOW/HOLE" to hold the "Roll" in place, by "tucking-in/pushing" it  INTO that 2-inch  "DIMPLE/HOLLOW/HOLE" (shown above by the 2 double curved arrows at the center front).   
After the collar is "folded/tuck-rolled" under itself, and pushed into that "hole" at CF shown by the double curved arrows....it will look like this--


You can play with and arrange the folds of the collar that surround the Rolled-Under "Pleat That Now Looks Like a Knot" that has been tucked into the CF "Hole/Hollow/Dimple"...anyway you want to.   Just make sure that the (pleated) Center Front of the COLLAR has been ROLLED UNDER ITSELF and Tucked-into the CF "hollow-dimple"


I hope that helps those who did not understand my first set of Tutorial instructions...I cannot think of any other ways to make this more clear than these extra instructions.   Thanks so much for visiting my Blog.


SEWING NOTES--  Fabric is a poly/lycra knit from Gorgeous Fabrics (purchased quite a while ago). Shoulder Seams and Hems are stabilized with poly/lycra Pro-Tricot Fusible Interfacing from Fashion Sewing Supply.

Labels: ,

What do you think? Please add a comment by clicking here--> 24 comments

11/05/2011

Tutorial- The "Spiral" Cowl Collar


As promised, here is a tutorial for making a cowl collar that has been "Spiraled" so that it drapes in lovely gentle folds that hide the neckline seam, rather than just "flopping down" in the front.  On a recent garment, I showed you the Spiral Cowl Collar on a drapey Rayon knit fabric...this blue one is made from heavy cotton/lycra knit Velour.

There may be other ways to make a Spiral Cowl...this is how I do it...
(Click on any Photo to enlarge)


Start with any basic knit top garment that has a Jewel neckline, and sew the shoulder seams. You may then choose to lower the Front Neckline a little bit more like I did here. This is not an exact science. A rule of thumb is that the thinner the fabric, the higher the neckline can be...when a thicker knit fabric is used, It is best to scoop the neckline a little lower (unless you want a wide, high collar). When I make this cowl, I just scoop the neckline a random amount...different every time ;)


Next, cut a cowl collar that measures 12"-20" Long x the Neckline Circumference + Seam Allowance.        The stretch of the knit should run the WIDTH of the collar.
WIDTH = NECKLINE CIRCUMFERENCE  Then fold it Right Sides Together so that it looks like this photo --->
and stitch the long edges together, forming a "tube".


Then turn the tube right sides out, folding it in half to enclose the seam allowances. It will look like this, a "regular" cowl collar that we have all seen before :)   The seam is the Center Back of the Collar, and it has 2 layers..the inner layer and outer layer.


Next we will start to "Spiral" the Cowl Collar, by sliding the INNER CB seam and the OUTER CB seam APART  by 3"-6"   


Now just ignore that the Center Back seam allowances are no longer laying on top of each other, and match and join the cut edges of the collar together. Match them all the way around, ignoring the way that the folded edge of the Collar will  "Spiral"  :)  You can join the edges by pinning them, or as I usually do, by running a quick line of basting.


Now that we have "Spiraled" our Cowl Collar, we need to mark it's new Center Back, 
by placing a pin 1/2 way between the seams that were spread apart, as shown below. 


To attach the Spiraled Cowl Collar to the neckline of your top, start by marking both the collar and the neckline edge at their 4  "quarter-points" with pins.

Then drop the Collar inside the Neckline edge,  Right Sides Together, matching the center back point of the Spiral Cowl Collar to the center back of the Neckline.  Then match the center fronts, and lastly the side points.  Stitch the collar to the neckline.


Turn the bodice right-sides-out, and finish sewing the rest of your top. Your collar will look something like this from the front (depending on how you arrange the folds).


And something like this from the back...


I hope you all enjoy creating your own "Spiraled Cowl" !

Labels: ,

What do you think? Please add a comment by clicking here--> 25 comments

3/25/2011

Sewing Tutorial- "Cuffed-Hem" Sleeve


Recently I made this custom shirt for one of my clients from light-weight distressed denim. It is one of my original designs and features  pin-tucks on the pocket and right front...and special "Cuffed-Hems" on the sleeves (see Tutorial below).  The Coconut Shell Buttons and Pro-Weft Interfacing used on this shirt are from www.FashionSewingSupply.


How to make a "Cuffed-Hem" Sleeve

For an approximately 1" finished Cuffed-Hem, you only need to make one simple change to your sleeve pattern. Just change the hem allowance to 2.25 inches (2-1/4"), as shown in this sample pattern.


After cutting out your sleeve, turn the bottom (hem edge) of the sleeve to the Wrong side by 1-1/8", then turn it again by the same amount (1-1/8"), then Press.  All we are doing here is "turning it twice to the wrong side" by 1-1/8" each time...just as if we were making a double hem.  This photo shows the bottom edge turned twice. The sleeve is shown photographed from the side so that you can see the folds--


When the folds have been pressed completely flat, take your sleeve to the sewing machine. 
Now Top-Stitch along the Bottom Edge  about 1/4", through all the layers. After stitching, this is what the sleeve will look like from the Wrong Side--


To finish the Cuffed-Hem, turn down the top fold (the one that was NOT stitched) and press. 
Here is what the finished Cuffed-Hem Sleeve looks like from the right side and the wrong side. The wrong side will have the raw edge enclosed, and the right side will have the Cuffed "Lip" that was formed when you stitched it!

Labels:

What do you think? Please add a comment by clicking here--> 12 comments

2/11/2011

TUTORIAL-- Fast and Fabulous Fabric Loops!


I do not have much time to sew these days, but I do have time to show you how I make "fabric loops"...for functional purposes. There is such a loop included in the Colette Patterns Negroni Shirt.
There are similar methods for making a length of tube to use for multiple buttons, however please note that this tutorial shows how I make a single flat loop for the specific purpose of replacing a buttonhole at the very top of a Convertible Collar shirt.

 ~Click Photos to enlarge...to return to blog, click your browser's Back Button~

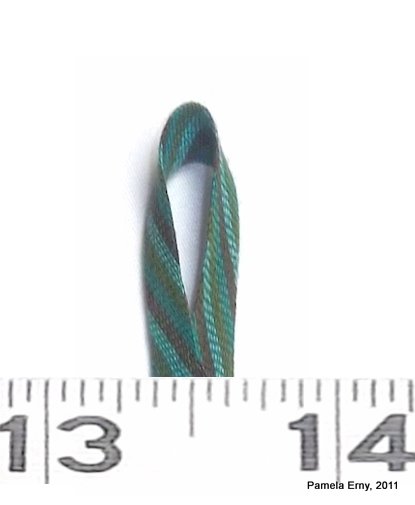
To make a single button loop, first start by cutting a strip of fabric on the bias that is about 1" wide and about 3" long.   Then as shown above, fold it in half width-wise (RIGHT SIDES TOGETHER) and "finger press" along the folded edge to make a center crease.


Now at your machine, pull out a long length of both the bobbin and top thread. As shown above, leave a loop of both thread tails behind the presser foot.  Then lay the rest of the pulled thread tails along the inner "valley" of the fold you made in the fabric strip.  What we are doing here is making our own "tool" out of thread, that we will later use as a handle to easily turn our loop!


Fold the bias strip in half, enclosing the thread tails as shown above. Loosen the top tension of your machine a little bit (if it is set at 5 for instance, loosen to 4.5).... then stitch a 1/4" seam.

The photo above shows what your stitched bias strip will look like after it is removed from the machine.  
Note that the thread tails are attached at one end of the seam, but loose inside the fold of the strip.

Now grasp the UNATTACHED thread tails, and start to gently pull them...turning your sewn bias strip right sides out.  Continue pulling those thread "handles" and turning the tube until all the seam allowances are inside.


Then take your turned strip to your pressing surface and press it flat, with the seam along one edge, as shown above.
Now we are going to "set" the bias and make our turned strip narrow and neat.  While still at your pressing surface, spray your flattened strip on both sides with some plain water until it is quite damp. Then pick it up, holding the short edges, one in each hand...and pull. Pull hard, so that the bias strip stretches, lengthens, and becomes more narrow.  Then cover with a press cloth, and press the stretched strip until it is dry. It will look something like this--
Now trim the ends, cut to the desired size, form your loop, and insert according to the pattern instructions.


Labels:

What do you think? Please add a comment by clicking here--> 13 comments

1/28/2011

TUTORIAL-- Clean-Finished No Bulk Facing (Shown on the Negroni Shirt)

Here's a "Custom Turn" on a technique many of you may already use to finish the outside edge of a facing. In this short tutorial I am demonstrating this method on the front facing of the Negroni Camp Shirt Pattern.

^ STEP 1 ^
The photo above shows the facing pattern cut out as usual on the CF edge (to the right), BUT cut about 1/8" wider on the curved outer edge (the edge my scissors are "pointing" to).

 ^ STEPS 2 & 3 ^
Next cut out your interfacing using THE CUT OUT FABRIC FACING PIECE for the INTERFACING "PATTERN" (I am using one of my custom-milled interfacings, Pro-Sheer Elegance Fusible Interfacing available exclusively at Fashion Sewing Supply). 
Then, place the Interfacing and Fabric Facing piece RIGHT SIDES TOGETHER (the fusible side of the interfacing will be "up"), and stitch them together with an 1/8" seam along the curved edge. If you click the photo above to enlarge it, this stitching is more visible.

^ STEP 4 ^
Now, open up (separate the 2 layers), and move the piece to your pressing surface.


 ^ STEP 5 ^
At your pressing surface, turn the interfacing to the wrong side, WRAPPING the interfacing OVER and AROUND THE NARROW SEAM, enclosing the seam allowances. Now fuse the interfacing according to the instructions.  Please note--The interfacing will not reach the long straight CF edge of the facing..and this is a good thing...no added bulk in that seam when it is later sewn !


The photo above shows the completed "Clean Finish" of this facing.  
Usually when the basic method of this technique is used, the allowances of that little seam are completely turned to the wrong side, then the interfacing is fused to hold them down. However, when the seam-allowances are WRAPPED by the interfacing, they are not only clean finished, but thin and bulk-free. And the added bonus is that when the shirt is completely sewn, it will look like flat piping has been sewn to the facing edge. This is such a nice custom look without the bulk that would transfer to the right side as a wrinkle/ridge every time the shirt is pressed !

Labels: ,

What do you think? Please add a comment by clicking here--> 16 comments

12/06/2010

NEW Tutorial-- Stretch NeckBand with Stable Back Seam

Most of us have made tops with necklines finished with simple stretch neckbands instead of binding. Here is rather dressy style that I made for myself with a narrow self-fabric Stretch Neckband...

And here is a casually styled Toddler Sweatshirt that I recently made for my favorite one-year-old little girl, with a neckband made from rib-knit...
Whether casual or dressy, made with self-fabric or ribbing...it is all too easy for a Stretch Neckband to end up looking "wonky" because the layers have shifted while being sewn to the neckline.  Keeping the seamed edges of a Stretch Neckband completely straight and stable while sewing it to the neckline can be tricky...especially with slippery knits !

Here is a way to stabilize and neatly enclose the back seam allowance of a Basic Stretch Neckband. This method may be common to experienced sewists, but it may be new to those who do not have much experience sewing with knits. Regardless, I hope you find it useful :)

So let's start :)
After you have determined how wide and long to make your Stretch Neckband (be it from a pattern piece, or your own design preference), it will look something like this example below...a single thickness of knit fabric.
(Please Note-- In this tutorial I am demonstrating with Rib Knit, aka "Ribbing")


The next step is to fold the strip in half, Right Sides Together so that the short ends meet, as shown below.
Usually, this is when we would sew the Back Seam of the Neckband, by stitching the short raw edges closed to form a circle (loop). But the next step is where this method differs from the norm.
Next, fold the entire strip in half again...this time from the top down. After making this fold you will have 4  (longer) raw edge layers that meet, 4 (short) raw edge layers that meet, and 2 folded ends that meet, as shown below.

Now take your folded Neckband Strip to the sewing machine, and stitch a seam starting from the TOP fold, through all four stacked short layers, as shown in the next 2 photos below. In this example I am using a 1/4-inch seam allowance.

We now have a twice-folded Neckband piece, that has had the 4 (short) layers seamed together. As a result, we also now have 4 layers of seam allowance. At this point, you can choose to grade the seam by trimming the 2 inner seam allowances.  
If I decide to grade this seam, I trim the 2 inner seam allowance layers by about half their width.

Now...finally...you will see the point of the extra fold and stitching those 4 stacked short edges together!
After the top edge is turned (flipped) over the seam allowances and all the raw edges meet,  your Stretch Collar Band is ready to be sewn to the neckline of your garment.
The folded back seam allowances have been "locked" together by the stitching that was done, and now will not shift or slip when being sewn to the garment...yay!

QUICK REVIEW--The following sketch illustrates the usual way a Stretch Neckline Band is sewn to the neckline of a garment.
From top to bottom: 1. Quarter-mark the raw edges of the Stretch Neckband, using the Center-Back Seam as one of the marks. 2. Quarter-mark the neckline edge of the Garment.  3. With right sides together, match the marks of the Stretch Neckband to the marks of the neckline, then sew the Neckline Band to garment...stretching the Neckline Band to fit the neckline edge.
^Click photo to Enlarge^


Labels:

What do you think? Please add a comment by clicking here--> 18 comments

10/30/2010

Tutorial-- Quick, Easy, Draped Cowl Variations !

With even more draped cowl patterns like this one from McCalls appearing in recent pattern catalogs, this revisit of a popular tutorial I wrote a few years ago is even more relevant today.

So, now I'll show you how quick and easy it is to make countless variations like these shown below from a basic draped cowl neckline...that can be done in mere minutes!


First, start with a drape-front cowl (photo #1 below) already in your wardrobe, or make one with the many patterns that exist for this style.

As shown In photo #2, turn the garment inside out and flip the front facing up to expose the wrong side of front of the top.


Next, for the most basic variation, pinch some fabric near center front, twist it a bit, and hold the “twisted pinched” fabric with a rubber band, as shown in photo #3.  I am showing this with a regular rubber band so it shows up in the photo, however a small clear "ponytail" band works best. Later, if you want to make this design change permanent, the 'twist' can be stitched. Or just remove the band, and you have your original draped cowl back again :)


Now turn down the facing to cover the banded fabric, as shown in photo #4.


As shown in photo #5 below,  when the garment is turned right-side-out, the twisted detail becomes a new interesting design feature of the top.


Where you pinch and band the fabric is totally up to you: higher, lower, to the left or right of center, using 2 or 3 twists, etc. There are infinite possibilities for design variations like these.... Have fun!

Labels: ,

What do you think? Please add a comment by clicking here--> 7 comments


Site Meter