OTC-011 Off The Cuff ~Sewing Style~ <body><script type="text/javascript"> function setAttributeOnload(object, attribute, val) { if(window.addEventListener) { window.addEventListener('load', function(){ object[attribute] = val; }, false); } else { window.attachEvent('onload', function(){ object[attribute] = val; }); } } </script> <div id="navbar-iframe-container"></div> <script type="text/javascript" src="https://apis.google.com/js/platform.js"></script> <script type="text/javascript"> gapi.load("gapi.iframes:gapi.iframes.style.bubble", function() { if (gapi.iframes && gapi.iframes.getContext) { gapi.iframes.getContext().openChild({ url: 'https://www.blogger.com/navbar/10604511?origin\x3dhttp://off-the-cuff-style.blogspot.com', where: document.getElementById("navbar-iframe-container"), id: "navbar-iframe" }); } }); </script>

10/22/2011

Sewing for ME! ...and a simple Pattern "Up-Sizing" Method.

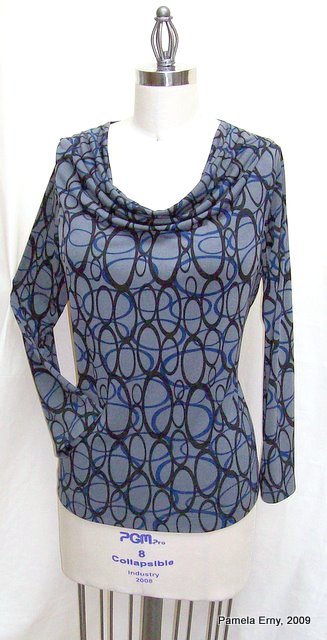
I already told you about the dreadful state of my wardrobe...it feels so good to be doing something about it!   Last week I made a few pairs of new pants, and this morning I finished this draped cowl Tunic...shown here with a "vintage" necklace that totally hides one of my neck scars :) 

The pattern I used for this top is my absolute favorite cowl pattern, Ottobre Design (Woman) issue 02/09, #5. However,  I have "up-sized" since I last made one of these, so I needed to "up-size" the pattern.  I didn't need to change much in the back, but I needed to add more room in the front. So, since this is a simple pattern for knit fabrics with a cut-on facing...my options for accomplishing this could be much less 'textbook' than if I was making changes to a pattern designed for woven fabrics.

So, here is what I did..to the Front of the tunic only--


I just moved the Center Front about 1" away from the fold of the fabric, and cut straight across at the top edge, and at the hem edge.  That's it!  

Now I had a front garment piece that gave me the 2" of extra room I needed for the "extra" that exists on my front at the moment ;)   Adding that extra width also made the cowl a little deeper...a side-effect I happen to like. 

Doing a "quickie" pattern alteration  like this worked for me because this is a simple knit silhouette.  Standard pattern alteration methods are best when you need to Up-Size a more complicated style, especially when designed for woven fabrics.

SEWING NOTES-- Fabrics shown were purchased at www.GorgeousFabrics.com  Ottobre Patterns can be found at www.OttobreDesign.com

Labels: , ,

What do you think? Please add a comment by clicking here--> 15 comments

9/22/2009

The Waterfall Cowl Revisited...Changing the Pleat Position.

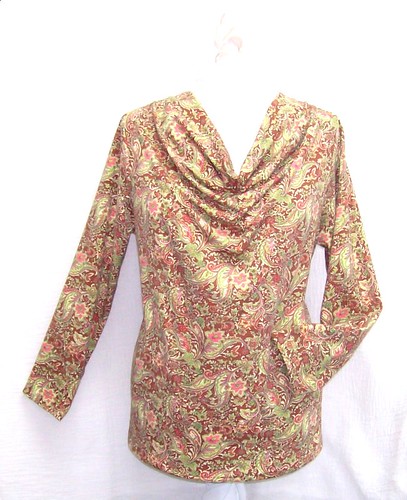
Here is another interpretation of Ottobre Woman Issue 2/2009, #5 ...the "Waterfall Blouse"
Ottobe "Waterfall" Drape Cowl

I always change the front shoulder gathers into a pleat when I make this style. On this newest top, I positioned the pleat near the shoulder point with the fold toward the shoulder seam. Orienting the pleat in this way results in a rounded drape...which I think suits the print of the fabric.


When I place the pleat near the neck edge , the drape folds form more of a V shape, as shown to the left (and in more detail further down the main page of the blog).


Both of these tops are welcome additions to my fall wardrobe.

Labels: ,

What do you think? Please add a comment by clicking here--> 16 comments

9/17/2009

Working with Diagonal Prints...The "Waterfall" Drape Cowl Top

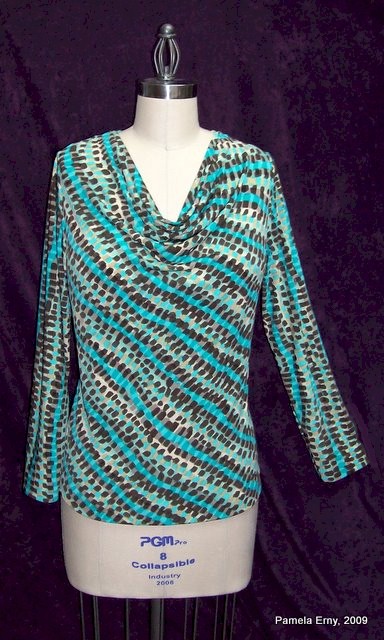
I made this top for myself last night, and I am very pleased with the way it turned out!   It is the "Waterfall" top from Ottobre Woman, 2/2009 Style #5.  Fabric is Poly/Lycra Jersey purchased several months ago from Gorgeous Fabrics.  You can see that the print is diagonal, but after draping it on my dress form, I knew it would work well for this style.

OttobreDrapeCowlTop

However, a little diagonal print goes a long way. So after some thought I decided to cut the front and back on the straight grain, utilizing the diagonal "stripes" for the main body pieces.  That left the sleeves. Cutting the sleeves on the straight grain would have made for a dizzying garment...all those diagonal "stripes"...oy!  So, I cut the sleeves on the bias. That changed the orientation of the print...the "stripes" now straight, not angled. This gives the garment balance....I won't look as if I am leaning to one side, LOL!

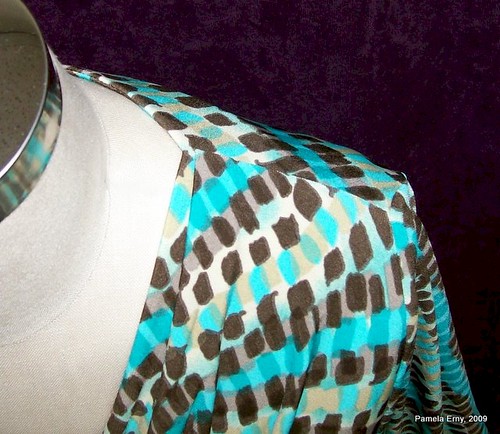
Of course, me being me,  I couldn't just sew this pattern as directed.  The instructions have you gather the front shoulder to meet the back shoulder.  In my experience, this tends to make the front shoulder look "puffy" after it is sewn. So instead of gathers, I formed a pleat in the front shoulder seam, placing it close to the neck edge...as you can see in the photo, below.

NecklinePleatDetail-CowlTop
The way you orient this pleat affects the way the cowl will drape. Placing it close to the neck edge with the pleat folded towards the neck, encourages the cowl to drape into a soft "V".   Placing the pleat in the center of the seam and folding it towards the shoulder will encourage the cowl to drape in a more rounded shape.

So, don't be afraid of diagonal prints!  Changing the grain layout can produce a stylish and flattering garment.

Labels: , ,

What do you think? Please add a comment by clicking here--> 22 comments

4/08/2009

The Waterfall Blouse, an Ottobre Woman Pattern

How much do I like this Top ? A Lot !

Ottobre Waterfall Top
Ottobre Woman, Issue 02/2009, #5

This top was made from a medium weight cotton/lyca knit without much drape...yet the neckline drapes beautifully. You can arrange the neckline folds in a "V" like I have shown here, or into a more rounded shape.

Please see the tutorial above, showing a way to neatly enclose all the facing/shoulder seams and encourage the neckline to fall into these nice folds.

Labels:

What do you think? Please add a comment by clicking here--> 9 comments


Site Meter