OTC-011 Off The Cuff ~Sewing Style~: Hot Patterns Collar/Lapel Tutorial, Part 1 <body><script type="text/javascript"> function setAttributeOnload(object, attribute, val) { if(window.addEventListener) { window.addEventListener('load', function(){ object[attribute] = val; }, false); } else { window.attachEvent('onload', function(){ object[attribute] = val; }); } } </script> <div id="navbar-iframe-container"></div> <script type="text/javascript" src="https://apis.google.com/js/platform.js"></script> <script type="text/javascript"> gapi.load("gapi.iframes:gapi.iframes.style.bubble", function() { if (gapi.iframes && gapi.iframes.getContext) { gapi.iframes.getContext().openChild({ url: 'https://www.blogger.com/navbar/10604511?origin\x3dhttp://off-the-cuff-style.blogspot.com', where: document.getElementById("navbar-iframe-container"), id: "navbar-iframe" }); } }); </script>

12/03/2006

Hot Patterns Collar/Lapel Tutorial, Part 1

Many of my readers have asked me to explain how the collar and lapel on many HotPatterns styles are sewn. So Let's start with the collar. As you can see in the photo, this collar may be shaped differently than other collars you have sewn before. To make it more clear, I have marked the stitching lines on the collar, so you can see which edges must be sewn before the collar can be applied to the shirt.
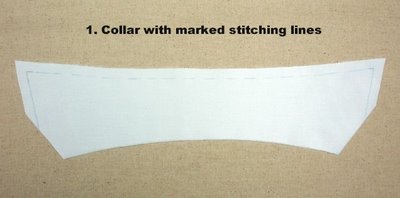

After the collar is stitched, turned and pressed, mark the match points with a dot on the lower corners of the collar.


CLICK HERE FOR PART 2 OF THIS TUTORIAL


Labels: , , ,

What do you think? Please add a comment by clicking here-->

0 Comments:

Post a Comment

<< Home


Site Meter