


Tutorial- How to Make a *Washable* Flower Embellishment

When I posted a photo of this little dress I made for Julianna, many of my readers asked how I make these washable "silk" flower embellishments. I am not a particularly crafty gal, so believe me when I say how easy it is ! There may be other ways, but this is how I make a washable "silk" flower embellishment--
This is what the silk (of course we know they are actually polyester) flowers typically look like when I buy them at the dollar store or craft store...

The first step is to pull the flower-head from the stem...

Next, Pull off the plastic back and the other plastic parts that hold all the petal layers together, and discard them...

Then carefully take the entire flower (meaning only all of the fabric petal layers) to your sewing machine, and zig-zag over the hole in the center, through all the layers of the flower. This will hold the petals in place and make the flower stronger. If you want to include the "leaves", position them under the flower layers before you zig-zag the center.

Now here is the step that will make your flower washable and colorfast :) Using "June Tailor-FRAY BLOCK", coat the outer edges of each and every petal. NOTE--I have tried to use "Fray Check", but have found that it leaves a white residue on the flower petals, so for flowers I always use "Fray-Block". The Fray-Block will seep onto the entire surface of the petals, and the flower will look shiny when it is wet....

Let your flower dry overnight, or hold it in front a fan for a few minutes to dry. When dry, it will no longer be shiny. Then choose a small button or bead to use as the "center" of your flower....
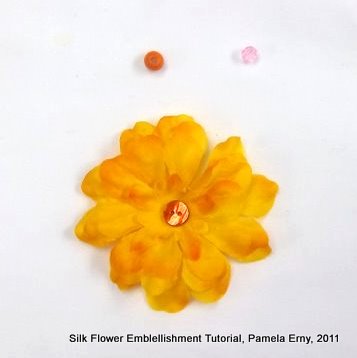
Now all you need to do is position your "now-totally-washable" flower where you want it to be on your garment, and then stitch through the button (or bead) + all the flower layers + the garment layers. I use strong upholstery thread, but several strands of regular thread will work just fine. After stitching, apply a few drops of Fray-Block on your threaded button/bead both from the top-center, and the tied-off back side to strengthen it. Alternatively, you can make this embellishment removable by just stitching the button or bead through all the flower layers, tying it off in back, and then attaching the flower to the garment with a safety pin.
I hope you will enjoy making your garments bloom!
Labels: Crafty Stuff
14 Comments:
love this thank you!!
This is brilliant!!!! I don't know when I will use this technique, but believe me, I WILL!! Thanks for sharing.
How FUN - Thanks!
How cute is this dress!
Very generous of you to share! Thanks.
Why didn't I think of that? Thank you!
Awesome.... Thank you and to think I am always purchasing fake flowers for my other crafts.
Thanks for sharing, Pam. Have to admit, I'm having a bit of a head slapping moment with the securing of the petals on the machine. As in, why didn't I think of that? :-) Excellent!
Pam, thank you for sharing this idea with us. I would have never thought of doing this. Your tutorials are always very helpful.
Cheryl in San Diego
Thanks for the great tutorial--what a cool way to add some fun to clothes!
I love knowing how to do this!!! I also love the tip on Fray Block, didn't know there was such a thing, but I'll be ordering some. I'd love to use this embellishment on my granddaughters dresses/tops.
Now why didn't I think of that?!? Great tutorial. Thanks!
so cute ...
i was just thinking why you/me can't find a *darling* button, sew it to the dress and make a small buttonhole in the flower, then just *button on* / attach the flower, removing it when it's time to wash the dress ... hope this makes sense ... LOL -- it did to me!!! ;-))) ...
darlene
Hi Darlene...what a great idea!!!! Thanks!
Post a Comment
<< Home