OTC-011 Off The Cuff ~Sewing Style~ <body><script type="text/javascript"> function setAttributeOnload(object, attribute, val) { if(window.addEventListener) { window.addEventListener('load', function(){ object[attribute] = val; }, false); } else { window.attachEvent('onload', function(){ object[attribute] = val; }); } } </script> <div id="navbar-iframe-container"></div> <script type="text/javascript" src="https://apis.google.com/js/platform.js"></script> <script type="text/javascript"> gapi.load("gapi.iframes:gapi.iframes.style.bubble", function() { if (gapi.iframes && gapi.iframes.getContext) { gapi.iframes.getContext().openChild({ url: 'https://www.blogger.com/navbar/10604511?origin\x3dhttp://off-the-cuff-style.blogspot.com', where: document.getElementById("navbar-iframe-container"), id: "navbar-iframe" }); } }); </script>

7/18/2014

How to Sew a "Better" Elasticated Casing !


The blouse shown above in soft cotton batik is one that I made a few years ago from this now "vintage"  HotPatterns.com design that I tweaked a little bit to have a closer fit.  This exact HP style (shown below) has been re-designed and is now offered as the  HP1169 Classix Nouveau Refined Peasant Blouse...and can be seen here on the HotPatterns website.
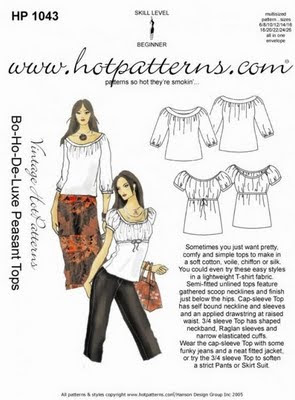
http://hotpatterns.com

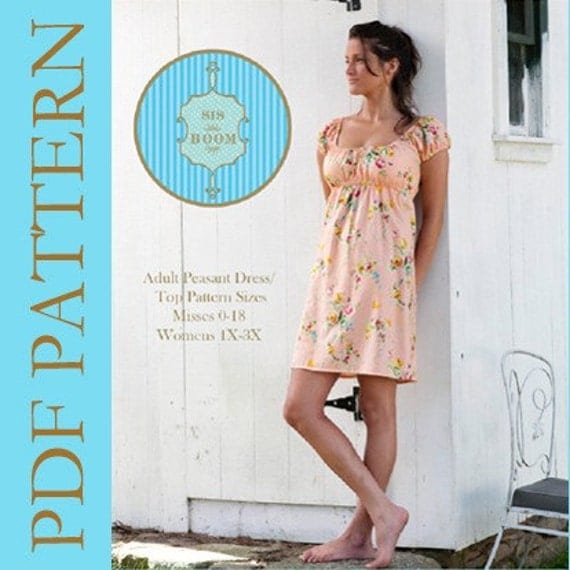
https://www.etsy.com/listing/29558029/womens-peasant-dress-pattern-sis-boom?ref=shop_home_active_9
Another great peasant-style top is this one from Carla Crim, "The Scientific Seamstress" 
 The basic differences between the 2 patterns is that the HotPatterns style has a lovely "couture-like" flowing silhouette, with sophisticated details.  The Meghan Peasant Pattern from "The Scientific Seamstress"   has a silhouette that is both relaxed yet fitted, with pretty sleeve style options, neckline options, and top-tunic-dress length options.  I've made them both, and I like the Hotpatterns style for soft flowing fabrics, and I like the Meghan for fabrics like lightweight cotton and soft washed linen.


OK..we know Elastic is on sale, we've got patterns to choose from...Now about those Elasticated Casings...

Making a casing for elastic is certainly one of our easier sewing tasks. Turn, stitch, insert elastic...done!  Sewn this conventional way, we end up with a perfectly acceptable casing that looks something like the photo below, after the elastic is inserted.  Fine...yet a little "bubbly and wobbly"...but something we have come to accept with elasticated casings.   
   (OK..a word here about "elasticated".  I am old enough to remember when *everyone* just said "elastic casing", then one day I started to hear elasticated this/elasticated that...so...today I choose to use the word, elasticated every so often...with a few plain "elastic casings" thrown in ;)  But yes, this is indeed just our old friend "the elastic casing" fancied up a bit)


By taking one additional construction step, you can achieve a "designer" look to an elastic casing garment. A very simple step that will result in a flat, even-edge casing every time, like the one in the finished garment shown....here is a close-up photo--  


So what's that extra construction step?  Edge-stitching!
After the casing is folded to the wrong side of the garment and stitched along the BOTTOM edge (leaving an opening to later insert the elastic, of course)....All that we need to do next to lend that "designer touch" is to edge-stitch the TOP fold of the casing...all the way around, as shown below--


By taking this one easy extra step, our elasticated casings lose the bubbles, 
and gain some designer panache!


Quick note from Pam....

Thank-you very much for shopping at my store and thank-you for continuing to follow my blog.  I have not blogged for a long time because of illness.  I am dealing with it in every positive way I possibly can, and I look forward to being able to teach you more "tricks of the shirt-making trade" as soon as possible.  Thanks again for continuing to follow me here and on Facebook. I appreciate it more than you know...and and I will be back...I promise  :)

Labels: , ,

What do you think? Please add a comment by clicking here--> 32 comments

4/02/2012

WrapOver Yoke Shirt...take 2

 
This variation of my Wrap-Over Angled Yoke Shirt was cut and sewn in a more casual way than the first. It is less fitted and its slightly rumpled look is intentional.  This shirt features angled cuffs, and a band collar that folds and buttons down on the left side.

SEWING NOTES--  Interfaced with Pro-Woven Shirt Crisp in the new Slate Gray color, from www.FashionSewingSupply.com .  Fabric is an incredibly soft pinpoint cotton shirting that is almost denim-like in appearance but far more luxurious. Click Here to see the fabric details at GorgeousFabrics.com  FYI...the only reason I am giving my source for this amazing cotton fabric is because I have already purchased several yards in both colors :)  I have no affiliation with Gorgeous Fabrics..I just buy a lot of fabric there ;)

So...which of the Wrap-Over Angle Yoke shirts do you like more...this very casual one, or the more fitted version in checked fabric with piping I posted last week (see below)?


Labels: ,

What do you think? Please add a comment by clicking here--> 5 comments

2/27/2012

Finally had time to sew...a new shirt for Roger!


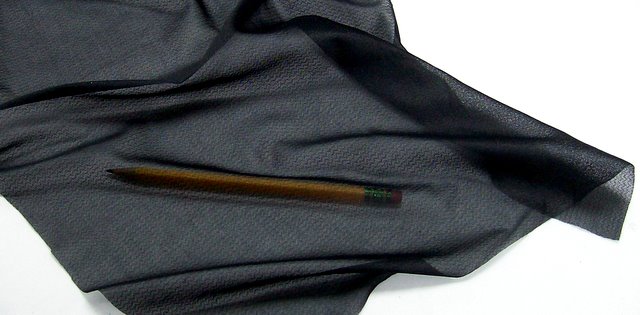
It's been a long time since I have sewn for Roger...he more than deserved a new shirt. I showed him a shirt made of wool gauze that I had designed for a client, and he really liked the fabric. So yesterday while watching a few old episodes of Nip/Tuck...I found some more wool gauze in my stash and made this new shirt for him.

I am looking at the photograph as I type this, and it appears that the right collar and right sleeve cuff are ever-so-slightly longer than their left counterparts...doesn't it ?!!?!  Please take my word for it, they are the same size!  It must have been the camera angle......sigh.....but I snapped over 40 shots of this garment before my cheap camera got the color right and I am not going to do it all over again (I could use some photography lessons, obviously).  And you'll just have to trust that I would never allow Roger out in public wearing a shirt with a wonky collar and cuffs....I wouldn't even allow it in private :)

Alrighty then...now that those issues are out of the way....

This shirt is of my original design, and is made from washed 100% wool "double-gauze". It features a tall standing collar, a "Cigar Pocket", and a double button treatment near the top of the front placket. Because the fabric is quite lightweight, I used Pro-Sheer Elegance Fusible  to interface the front button plackets, and 2 layers of ProSheer Elegance Fusible to interface the collar, collar stand, and cuffs. The buttons are imported Italian Designer Shirt Buttons, in the "Choco-Toffee" color.   Buttons and Interfacing both from www.FashionSewingSupply.com .
Labels: ,

What do you think? Please add a comment by clicking here--> 22 comments

1/23/2012

Make your own Fusible Stay-Tape...without cutting strips!


Make your own Fusible Stay Tape...without tedious cutting or trimming!


You can make any width of fusible stay tape that you may need if you have 


It's So Easy....because ProWeft Supreme Lightweight will tear perfectly straight along the cross-grain, every single time!  All you need to do to make your own fusible stay tape is to make a little snip at the selvedge edge, then tear the ProWeft Supreme Light across the width of the yardage. Because ProWeft Supreme Light is so wide, each strip will be 60" long.

The tape I made shown in the photo above was "snipped-then-torn" about 3/8-inch wide. You can tear your strips at any width from 1/4" to 1/2" to use for reinforcing the front edges of jackets (or for wherever you need to use a soft "fusible stay tape"), up to 2-3 inches or more to reinforce jacket hem and sleeve vents, and other tailoring/dressmaking uses.

This "Stay-tape" will fuse easily along any straight fabric edge, and because ProWeft Supreme Lighweight is so flexible, you can follow any curve or angle easily (as you can see in the photo above).


What makes this Interfacing so special?


Pro-Weft Supreme Lightweight Fusible  has become known as "The interfacing for All Seasons" because it is a knit and woven interfacing combined into one fabulous product that  "breathes" because of its unique weave and its specially formulated highly flexible fusible resin. 

Custom-milled exclusively for Fashion Sewing Supply, it is available in both Natural or  Charcoal Black.  It's terrific for tailoring (especially as a complete underlining for jackets and coats), stablizing hems, wonderful for waistbands, and super for casual shirts made from medium to heavy weight fabrics like denim, chambray, hemp, and flannel.  Pro-Weft Supreme Light is perfect for so many types of fabrics and weaves like Linen, Boucle, Silk, Gabardine, Wools, Denim, Twill, and more!
 

How is it different than other kinds of Interfacing?

A woven interfacing like ProWoven Standard has the lengthwise fiber threads (warp) and crosswise fiber threads (weft) woven together.   PRO-WEFT Supreme Lightweight is a special kind of "weft insertion" interfacing where the fiber threads are first knit, and then crosswise (weft) fiber threads are woven (inserted) into the knit yardage.

Woven interfacing like ProWoven Standard  is totally stable. Knit interfacing like  
Pro-Tricot Deluxe is soft and has stretch. By combining the properties of both knits and wovens, PRO-WEFT Supreme Lightweight is both totally stable and wonderfully flexible.


Please visit ~FASHION SEWING SUPPLY~ for more information.

Labels: ,

What do you think? Please add a comment by clicking here--> 7 comments

12/05/2011

Spot-Fusing...A modern Tailor's Method

While I am taking some time off from Blogging to take care of some personal business, Here is a repeat of one of my most popular Tutorials.....

Block Fusing is a method that many modern tailors and home-sewists use to apply interfacing to fashion fabric yardage before the pattern pieces are cut out. Have you ever struggled keeping the interfacing layer from slipping off-grain as you attempt to fuse it to your fabric yardage?  Next time, try this fast, easy, and accurate method that I learned from a Master Tailor during my apprenticeship, called "SPOT-FUSING"...And it can be done right on your cutting table!
^ STEP 1 ^
First, we need to prepare the surface of the table. The photo above shows my cutting table covered with 2 layers of HEAVY weight muslin (from Gorgeous Fabrics), and one layer of very thick wool (a heavy wool blanket will work as well..I just happen to have felted wool yardage that I use for this technique).  It is VERY important that these layers be smooth and free of wrinkles, so thoroughly smooth them out before proceeding.


 ^ STEP 2 ^
Next, lay out your fashion fabric on top of your "padded" table, WRONG side UP...making SURE it is smooth. What you see in the photo above is 3 yards of 60" wide silk/wool suiting fabric. The cut edge of the fabric is to the left, with the rest of the yardage hanging off the right side of my table. There is no need for weights to hold the fabric in place...the under-layer of wool holds it nicely.  But if you need to, weights can be placed along the top edge (in the above photo, the (top) cut edge is to the left).


^ STEP 3 ^
Now lay your Interfacing FUSIBLE Side DOWN on the (wrong side) of the fashion fabric, making sure it is smooth and on grain. I am using Charcoal-Black Pro-Weft Supreme Light Interfacing, one of my custom-milled professional grade interfacings available exclusively at Fashion Sewing Supply.


^ STEP 4 ^
This is where the Spot-Fusing happens :)   USING a thin PRESS CLOTH, and your steam iron set to a low-wool setting, start moving your iron over the interfacing with an UP and DOWN motion. DO NOT slide the iron, just move it all over the interfacing, pressing with steam for a few seconds, picking up the iron, moving it over an inch or so, and steam pressing again for a few seconds. I start pressing in the middle along one edge, and spot-press to one side until I reach the edge of the yardage, then begin again in the middle and work towards the other edge. I keep repeating this, working my way down and along the yardage, until all the yardage on my table has had the interfacing "tacked" (SPOT FUSED) down. Then I carefully pull the next section of fabric + unfused interfacing so that it covers the table, making sure that all is smooth and on-grain...then repeat the Spot-Fusing process again until all the fashion fabric yardage has been Spot-Fused.  I can Spot Fuse a few yards of 60" fabric in about 5-10 minutes.
Please note that the object here is to just tack the interfacing to the fabric...NOT to fuse it completely..that comes later.


^ STEP 5 ^
After removing the Muslin+Wool "padding" from your cutting surface, carefully lay your Spot-Fused fabric yardage right side up, lay out your pattern pieces and cut them out.


  ^ STEP 6 ^
 NOW is the time when we take our garment pieces to our "official" pressing surface (your Ironing Board or ClamShell Press), and "finish the fuse"...following the complete fusing instructions that come with your interfacing.

And this is why I Spot-Fuse before I Block-Fuse: Why bother spending time and effort completely Block-Fusing ALL the yardage, including the scraps that will be thrown in the trash after the pattern pieces are cut ?  By Spot-Fusing, I can ASSURE a perfect fuse and save time by fully pressing/fusing just the actual garment pieces...AFTER the interfacing has first been "tacked down" by the Spot-Fusing :)

Labels:

What do you think? Please add a comment by clicking here--> 9 comments

11/16/2011

Interfacing at the Movies ?

(I apologize for the appearance of this post...Blogger is doing it's own thing with Bold Text today, and I cannot get it corrected.....!)
Yes!  The Universal Pictures Costume Department (on location in Boston) contacted my small business, Fashion Sewing Supply , for Interfacing Swatches. The tailors there loved our products...and we sold many yards to them for use in the upcoming feature film, R.I.P.D. !  Yep, that's Pro-Woven Shirt Crisp, Pro-Weft, and the Pro-Tailor line of Interfacings in those collars, plackets, waistbands, and lapels !    
 
Production is under way on this adventure about a team of ghostly police officers who bring unwilling souls to the underworld. R.I.P.D. comes to theaters June 28th, 2013 and stars Ryan Reynolds, Jeff Bridges, Kevin Bacon, Stephanie Szostak, Mary-Louise Parker, Marisa Miller, James Hong, Robert Knepper. The film is directed by Robert Schwentke.


I am such a geek...I am so excited!
                                                       
As one of my friends said, "This will be the first time I go to see a movie for the Interfacing."
LOL!


Labels:

What do you think? Please add a comment by clicking here--> 25 comments

10/27/2011

New Custom-Milled INTERFACING

NEW styles of interfacing have arrived  at Fashion Sewing Supply !


  • PRO-TAILOR Classic Sew-in HAIR CLOTH/CANVAS 63"
  • PRO-WEFT Supreme MEDIUM-weight Fusible INTERFACING 66"
  • PRO-TAILOR Classic Fusible HAIR CLOTH/CANVAS 68" 
 To see these NEW custom-milled Interfacings, 
along with all of our other Professional-Grade Interfacings,
just CLICK HERE

    Labels:

    What do you think? Please add a comment by clicking here-->

    10/10/2011

    WTH is this ? ...and Cool New Stuff Coming!


    WTHeck is right...isn't it pitiful? 

    This quick pair of denim pants and a bag full of blouse "pieces" ready to be stitched,    is all I've been able to accomplish since the sale started at         Fashion Sewing Supply.   I knew our elastic was popular, but I never imagined it was quite this popular: I've cut well over 900 yards in just a few days, and have a stack of orders to fill!  But I am certainly not complaining, I'm truly grateful...the hordes of people after me to pay outstanding medical bills will  hopefully stop pestering me...for a while ;)

    But enough with the kvetching....
    Exciting NEW styles of Interfacing are on the way!  


    I've developed some wonderful new Traditional Sew-in Hair Canvas (sometimes called Hymo) that is 50% hair and 50% wool...NO synthentics...and it's 63" wide.   It is the type and quality that is sought after by the finest tailors in the world...but...we have had it steamed for you so it's ready to use right away! No pre-treatment is necessary...none-nada-zilch!  It does Not shrink. At. All.

    We have the same quality 50/50 Hair Canvas (68" wide) that's been specially woven to accept the application of the wonderfully flexible fusible resin we've become known for.  Again, this new Fusible Hair Canvas needs no pre-treating...the yardage has been thoroughly steamed...it does NOT shrink.

    Does it get better?  Yes!

     I've also had a fabulous new Medium-weight Fusible Weft with a unique texture milled in Charcoal black and Ivory just for Fashion Sewing Supply, ...and OMG it's TDF !  As always, we've done the pre-shrinking for you...and it's even washable after fusing it to your fabric :)

    I am just waiting for the rolls to get here (5-6 days more days), before I can put them up for sale on www.FashionSewingSupply.com.  Maybe I should have waited before telling you about them...but after developing and testing them for months, I am just so excited that they are almost here!

    If you want to be notified when they arrive, just sign up for the Fashion Sewing Supply Newsletter (tan box on the the left of the blog page).

    OK... Now I have to go catch a bite to eat, catch my breath, and then get back to work...I am so glad I love my job!

    Labels: ,

    What do you think? Please add a comment by clicking here--> 1 comments

    7/16/2011

    Giveaway WINNERS !


    Thanks to all who enetered the Giveaway of products from 

    Because of the great response 
    to this Giveaway, 
    I decided to draw 4 winners !


     And they are...
    • Faye Lewis
    • Kai Jones, Happy Valley OR
    • Alethia H, Augusta
    • Melissa F, London 
     
     Will the four of you please send an email to me at  
    OffTheCuffStyle "at" Yahoo "dot" com  
    with your Full Name and Shipping Address ? ...and I'll get your goodies shipped to you as soon as possible!   Thanks, ~Pam

    Labels:

    What do you think? Please add a comment by clicking here--> 1 comments

    5/11/2011

    HAPPY DANCE--- FSS is back!

    Our Official E-Commerce Website---> www.FahionSewingSupply.com
    (for our United States Customers) 
    is Back Online !


    International Customers...to shop for our products, please click HERE

    Labels: , ,

    What do you think? Please add a comment by clicking here--> 0 comments

    4/16/2011

    Yay! NEW "Shirt-Crisp" INTERFACINGS are here!


    You've been asking us to make these special types of interfacings available to you, and after finally finding a mill willing to make them 
    according to my very picky standards...they are here!

    After extensive testing in our own busy ShirtMaking Studio, we are convinced that our NEW Pro-Woven SHIRT CRISP Fusible Interfacing and our NEW Pro-Woven SUPER CRISP Fusible Interfacing are the best woven fusible interfacings available anywhere!   Exclusive to Fashion Sewing Supply, these fantastic NEW fusible interfacings were specially made to produce perfectly CRISP shirt collars and cuffs, and can also be used to strengthen cotton quilting fabrics when making purses. 

    They Absolutely DO NOT SHRINK and are WASHABLE on warm-to-hot settings AFTER FUSING TO FABRIC !

    If you want interfacing for shirt collars and cuffs that look just like the expensive designer shirts you see in stores...THIS IS IT!

    The difference between our Pro-Woven Shirt Crisp and Super Crisp Fusible Interfacing and ordinary woven fusible interfacing is that the base fabric is steamed to eliminate shrinkage before the special fusing adhesive is carefully applied to give full and even coverage.   These will be the best woven fusible interfacings for shirts (and other applications) that you have ever used!


    Get all the details and the Special Introductory Prices HERE at Fashion Sewing Supply.

    And I'll be back to sewing and posting tutorials as soon as my docs allow me to do more activity...like digging through my fabric stash ;)  xox~Pam

    Labels:

    What do you think? Please add a comment by clicking here--> 3 comments

    3/15/2011

    BIG Thanks to Vogue Patterns Magazine !


    What an honor it is for my business,
    Fashion Sewing Supply, to be featured in the current (April/May 2011) issue of Vogue Patterns Magazine! 
    An editor contacted me several weeks ago to let me know that my business had been chosen to be among 4 featured in the "Web Watch" Editorial.  No, it's not an advertisement...they found us worthy of inclusion
    ...and I am beyond thrilled!

    Here's what they had to say....

    Labels:

    What do you think? Please add a comment by clicking here--> 14 comments

    3/12/2011

    A Shirt in Pieces...

    There actually has been some sewing going on around here :)   
    My clients want new custom shirts, ASAP!


    Here is what is on the machine right now...please pardon my hasty pinning of the pieces on my photo-wall. Later today it will be a short sleeve shirt with a contrast under-placket, piped pocket, and contrast inner band collar. I designed and drafted the pattern by hand. 

    Buttons were quickly placed on the left front of this green striped oxford cloth shirt. Of course they will actually be sewn onto the right contrast under-placket...but I wanted to preview my selection where they will be seen when the shirt is "on the body".  I am quite pleased with the color and style of the buttons I decided to use...one of our new Italian Designer Shirt Button styles, color-Latte, from Fashion Sewing Supply.

    So stay tuned for a photo of the finished shirt, I should have it posted here first thing tomorrow :)

    Labels: ,

    What do you think? Please add a comment by clicking here--> 5 comments

    2/18/2011

    Button, Button, Who Has New Shirt Buttons?

    WE DO !

    NEW Designer Shirt Button Sets have just arrived at FASHION SEWING SUPPLY


    We are proud to be able to offer you these fabulous shirt buttons that come to us straight from a famous Italian designer’s workroom…at a great low price !  
    We photographed the buttons on different colored background fabrics to highlight their versatility.  Remember…Yes, you CAN use contrasting buttons on shirts and blouses…just like the top designers do !
    Each 40-button set contains:
    • 30 Buttons for Shirt Fronts, size 7/16"  (use a 1/2" buttonhole)
    • 10 matching Buttons for Sleeve Plackets and/or Button-down Collars, size 5/16"  (use a 1/4" buttonhole)
    • 4 Round Felt “button backers” for use behind Collar Buttons to stabilize the fabric.
    And before I forget... many new styles and colors have been added to our popular Shirt/Blouse bulk "Buttons-by-The-Scoop" assortments too!

    Please visit FASHION SEWING SUPPLY to see the new bulk shirt buttons 
    and all the NEW Designer Shirt Button Sets.


    Labels:

    What do you think? Please add a comment by clicking here--> 0 comments

    1/28/2011

    TUTORIAL-- Clean-Finished No Bulk Facing (Shown on the Negroni Shirt)

    Here's a "Custom Turn" on a technique many of you may already use to finish the outside edge of a facing. In this short tutorial I am demonstrating this method on the front facing of the Negroni Camp Shirt Pattern.

    ^ STEP 1 ^
    The photo above shows the facing pattern cut out as usual on the CF edge (to the right), BUT cut about 1/8" wider on the curved outer edge (the edge my scissors are "pointing" to).

     ^ STEPS 2 & 3 ^
    Next cut out your interfacing using THE CUT OUT FABRIC FACING PIECE for the INTERFACING "PATTERN" (I am using one of my custom-milled interfacings, Pro-Sheer Elegance Fusible Interfacing available exclusively at Fashion Sewing Supply). 
    Then, place the Interfacing and Fabric Facing piece RIGHT SIDES TOGETHER (the fusible side of the interfacing will be "up"), and stitch them together with an 1/8" seam along the curved edge. If you click the photo above to enlarge it, this stitching is more visible.

    ^ STEP 4 ^
    Now, open up (separate the 2 layers), and move the piece to your pressing surface.


     ^ STEP 5 ^
    At your pressing surface, turn the interfacing to the wrong side, WRAPPING the interfacing OVER and AROUND THE NARROW SEAM, enclosing the seam allowances. Now fuse the interfacing according to the instructions.  Please note--The interfacing will not reach the long straight CF edge of the facing..and this is a good thing...no added bulk in that seam when it is later sewn !


    The photo above shows the completed "Clean Finish" of this facing.  
    Usually when the basic method of this technique is used, the allowances of that little seam are completely turned to the wrong side, then the interfacing is fused to hold them down. However, when the seam-allowances are WRAPPED by the interfacing, they are not only clean finished, but thin and bulk-free. And the added bonus is that when the shirt is completely sewn, it will look like flat piping has been sewn to the facing edge. This is such a nice custom look without the bulk that would transfer to the right side as a wrinkle/ridge every time the shirt is pressed !

    Labels: ,

    What do you think? Please add a comment by clicking here--> 16 comments

    1/25/2011

    TUTORIAL--- Spot-Fusing vs. Block-Fusing Interfacing, a Modern Tailor's Method

    Block Fusing is a method that many modern tailors and home-sewists use to apply interfacing to fashion fabric yardage before the pattern pieces are cut out. Have you ever struggled keeping the interfacing layer from slipping off-grain as you attempt to fuse it to your fabric yardage?  Next time, try this fast, easy, and accurate method that I learned from a Master Tailor, called "SPOT-FUSING"...And it can be done right on your cutting table!
    ^ STEP 1 ^
    First, we need to prepare the surface of the table. The photo above shows my cutting table covered with 2 layers of HEAVY weight muslin (from Gorgeous Fabrics), and one layer of very thick wool (a heavy wool blanket will work as well..I just happen to have felted wool yardage that I use for this technique).  It is VERY important that these layers be smooth and free of wrinkles, so thoroughly smooth them out before proceeding.


     ^ STEP 2 ^
    Next, lay out your fashion fabric on top of your "padded" table, WRONG side UP...making SURE it is smooth. What you see in the photo above is 3 yards of 60" wide silk/wool suiting fabric. The cut edge of the fabric is to the left, with the rest of the yardage hanging off the right side of my table. There is no need for weights to hold the fabric in place...the under-layer of wool holds it nicely.  But if you need to, weights can be placed along the top edge (in the above photo, the (top) cut edge is to the left).


    ^ STEP 3 ^
    Now lay your Interfacing FUSIBLE Side DOWN on the (wrong side) of the fashion fabric, making sure it is smooth and on grain. I am using Charcoal-Black Pro-Weft Supreme Light Interfacing, one of my custom-milled professional grade interfacings available exclusively at Fashion Sewing Supply.


    ^ STEP 4 ^
    This is where the Spot-Fusing happens :)   USING a thin PRESS CLOTH, and your steam iron set to a low-wool setting, start moving your iron over the interfacing with an UP and DOWN motion. DO NOT slide the iron, just move it all over the interfacing, pressing with steam for a few seconds, picking up the iron, moving it over an inch or so, and steam pressing again for a few seconds. I start pressing in the middle along one edge, and spot-press to one side until I reach the edge of the yardage, then begin again in the middle and work towards the other edge. I keep repeating this, working my way down and along the yardage, until all the yardage on my table has had the interfacing "tacked" (SPOT FUSED) down. Then I carefully pull the next section of fabric + unfused interfacing so that it covers the table, making sure that all is smooth and on-grain...then repeat the Spot-Fusing process again until all the fashion fabric yardage has been Spot-Fused.  I can Spot Fuse a few yards of 60" fabric in about 5-10 minutes.
    Please note that the object here is to just tack the interfacing to the fabric...NOT to fuse it completely..that comes later.


    ^ STEP 5 ^
    After removing the Muslin+Wool "padding" from your cutting surface, carefully lay your Spot-Fused fabric yardage right side up, lay out your pattern pieces and cut them out.


      ^ STEP 6 ^
     NOW is the time when we take our garment pieces to our "official" pressing surface (your Ironing Board or ClamShell Press), and "finish the fuse"...following the complete fusing instructions that come with your interfacing.

    And this is why I Spot-Fuse before I Block-Fuse: Why bother spending time and effort completely fusing ALL the yardage, including the scraps that will be thrown in the trash after the pattern pieces are cut ?  By Spot-Fusing, I can ASSURE a perfect fuse and save time by fully pressing/fusing just the actual garment pieces...AFTER the interfacing has first been "tacked down" by the Spot-Fusing :)

    Labels: , ,

    What do you think? Please add a comment by clicking here--> 21 comments

    1/08/2011

    TUTORIAL- Design and Sew a Shirt with Bias Pleats !

    This Distressed denim shirt features deep bias pleats 
    on the sleeves and pocket. Variations of this design have become favorites of many of my clients over the past year.  The original blog post about this design detail was among my most popular. So with a few shirt-sew-along's going on at other blogs these days...I thought it was a good time 
    to offer it again, with a few revisions.
     
    ---------------------
    SEWING NOTES: This shirt is interfaced with PRO-WEFT Fusible,
    a professional quality interfacing found exclusively at
    ~Fashion Sewing Supply~

    ____________________________
    Adding a pleat to any pattern piece is very easy 
    when you use this method:

    1.  Using a large piece of any pattern paper you like, make an even fold across it's width (this will be the upper side of the pleat).  Then move the entire folded edge an even distance away from the first, and fold again (this will be the under-side of the pleat). I moved the first fold over by 1.25", to form a 1.25" pleat in the paper. Play with a small  piece of scrap paper, if my written explanation is less than clear ;)  It's easy, all we are doing is folding a pleat in a piece of pattern paper.

    2. Next, just place your pattern piece on top of the pleated paper, with the pleat where you want it to be on your garment. In this case, I chose the sleeve piece pattern and placed it so that the pleat (the pre-folded paper) would be on the bias, then I  cut out my "new" sleeve pattern.
    3. This is what my sleeve looked like cut from the fabric. I took the photo after the upper pleat fold was pressed, so you could more easily see how the pleat is formed
    .
    4. This photo (#4) shows the completed pleat, with the folds edge-stitched. In this photo, as viewed from the right side, only the upper fold's edge-stitching is visible. The under-fold (back side) of the pleat is also edge-stitched.  I like to edge-stitch pleats on shirts that I design not only because it is a nice decorative detail, but also because it makes pressing the shirt much easier after it has been laundered.
    -------------------------
    How to Control a Pleat...Invisibly !

    When there is a bias or horizontal pleat on a garment, the weight of the fabric below the pleat will tend to pull it down, and the pleat will sag and gape open. When the pleats are small and/or the fabric is lightweight, this is often not a problem. However, with pleat depths of one inch or more on medium or heavy fabric, this sagging can be quite an ugly problem. But as you can see in the photo of the finished shirt (above), the pleat is not gaping or sagging. That is because the pleats have been "controlled", by span-stitching done on the under-fold  (back side), as shown in this next photo--
    To control this bias pleat, I made a series of  3 wide "V" shaped stitch spans on the under-pleat fold (that I highlighted in blue pencil so that you can more easily see them).  Each extend from the edge of the under-pleat fold to within 1/4" of the upper pleat fold. While it may be a little distracting to understand from the photo alone, if you make up a quick sample of any pleat from scrap fabric, and do this "V" shaped Span Stitching  as shown, it will become clear how it works to control the pleat.
    Please note that these pleats are NOT functional pleats..they are decorative only. So restricting how much they are allowed to open will make no functional difference at all. As you can see from the photo of the completed shirt, the pleats still appear to be quite deep. They are just "not allowed" to gape open because of this inner, invisible/hidden stitching.

    So the next time you make a shirt, why not try something a little different by adding some of your own interesting design details...like pleats in unexpected places !     

    And...if you like these little tutorials of mine, please vote for me by clicking the black/red "Seamingly" Vote box to the left on the side-bar...thanks :)

    Labels: , ,

    What do you think? Please add a comment by clicking here--> 4 comments

    10/18/2010

    TUTORIAL: Ravel Grading...A Master Tailor's Technique


    There are many ways to grade seams. Among them are trimming one seam allowance narrower than the other, turning the scissors on edge to "bevel" the allowances, and using Pinking Shears.  But the hands-down most elegant and effective way I was ever shown, is to "Ravel Grade".  This was the favored technique taught to me by my Master Tailor mentors during my apprenticeship. You are unlikely to find this technique in any tailoring books, as it is a very esoteric "old world" technique.

    Below you will see a photo of 2 pieces of wool, that have been underlined with Pro-Weft Fusible Interfacing to within 3/16-inch of the seam edges. The 2 pieces of wool have been placed right sides together, and you can see (very faintly in blue), that a 5/8" seam has been sewn down the length of the two pieces, on the right.

    ^ Click to enlarge ^

    The first and only step in the "Ravel Grading" process is very easy. Merely ravel off a few threads from the edge of both seam allowances, leaving soft fringed edges. So what does that accomplish?  In this example, by completely removing the warp (lengthwise) thread  from the seam allowance edges...the fabric there is now half as thick as before!
    NOTE--Both seam allowances will be trimmed to 3/8" in some areas like lapel edges and jacket fronts before being Ravel Graded, and will remain "married" (not pressed open).  But instead of being the thickness of 2 layers of fabric, one layer has been raveled away resulting in the edge-bulk being totally eliminated...the finished lapel and jacket front edges (collar edges, etc) will be sharp and completely flat after pressing.

    ^ Click to enlarge ^

    In the photo below, you will see the seam allowance pressed open. Notice how elegantly the bulk from the allowance edge has disappeared, because the fabric there is now half  of it's original thickness!  And to think that all that needed to be done was ravel away a few threads :)
    ^ Click to enlarge ^

    So I ask you...which seam allowance shown below will be far less likely to leave a "pressing ridge" on the right side of a finished garment?  The "pinked" side...or the side that was Ravel Graded ?  Especially if your fashion fabric is very thick, highly slubbed, or other wise textured?  Why the "Ravel Graded" side, of course :)
    ^ Click to enlarge ^

    SEWING NOTES: Medium weight wool flannel fabric is underlined with Pro-Weft Fusible Interfacing, a very lightweight highly flexible interfacing available exclusively at Fashion Sewing Supply.  

    In case you are wondering...about half the beautifully tailored, very expensive garments that were created in the shop during my apprenticeship were made with fusible interfacings that my mentors imported from Italy.  When I created my own line of custom-milled fusible interfacings, I managed to reproduce the same uncompromising "premium" professional quality. If they were still on this earth, I dearly hope that my mentors would be proud of my efforts :)

    Labels: , ,

    What do you think? Please add a comment by clicking here--> 26 comments

    7/01/2010

    The most Elegant of Interfacings...


    Sheer Elegance Interfacing
    ~~Pro-SHEER ELEGANCE~~

    Now available exclusively at FASHION SEWING SUPPLY ! 
    Pro-Sheer Elegance Fusible Interfacing...is the the ultimate lower-temperature fusible interfacing for stable knits and sheer to lightweight woven fabrics.
    This sheer matte interfacing truly is different. Due to its unique weave and fiber content, it has 10% controlled stretch in the cross-grain, and is stable in the lengthwise grain. Pro-Sheer Elegance is made from a combination of Polyester, and stable Rayon  and can be fused at "low-wool to 
    wool" settings of your iron.  It does NOT shrink.

    It is absolutely the most amazing interfacing
    that we have ever experienced!
    Pro-Sheer Elegance barely affects the drape of fabric,
    yet will add enough support
    for stable facings, buttonholes, etc.
    It is sheer, matte, silky, 60" wide....absolutely fabulous!

    Pro-SHEER ELEGANCE FUSIBLE,
    90% Polyester, 10% Rayon-- 60" wide
    COLORS-- White or Black
    Please visit FASHION SEWING SUPPLY for more information.

    Labels: , ,

    What do you think? Please add a comment by clicking here--> 3 comments

    6/29/2010

    A Little Retro...


     I have been having such fun sewing for my 2 little friends... Julianna age 3, and her sister Brooklyn, age 9 months!
    This set for Julianna was meant to have a  retro look.  Made with soft cottons fabrics, I  re-designed basic Ottobre Design patterns to achieve what I think is a very sweet set.

    Labels: ,

    What do you think? Please add a comment by clicking here--> 5 comments


    Site Meter